
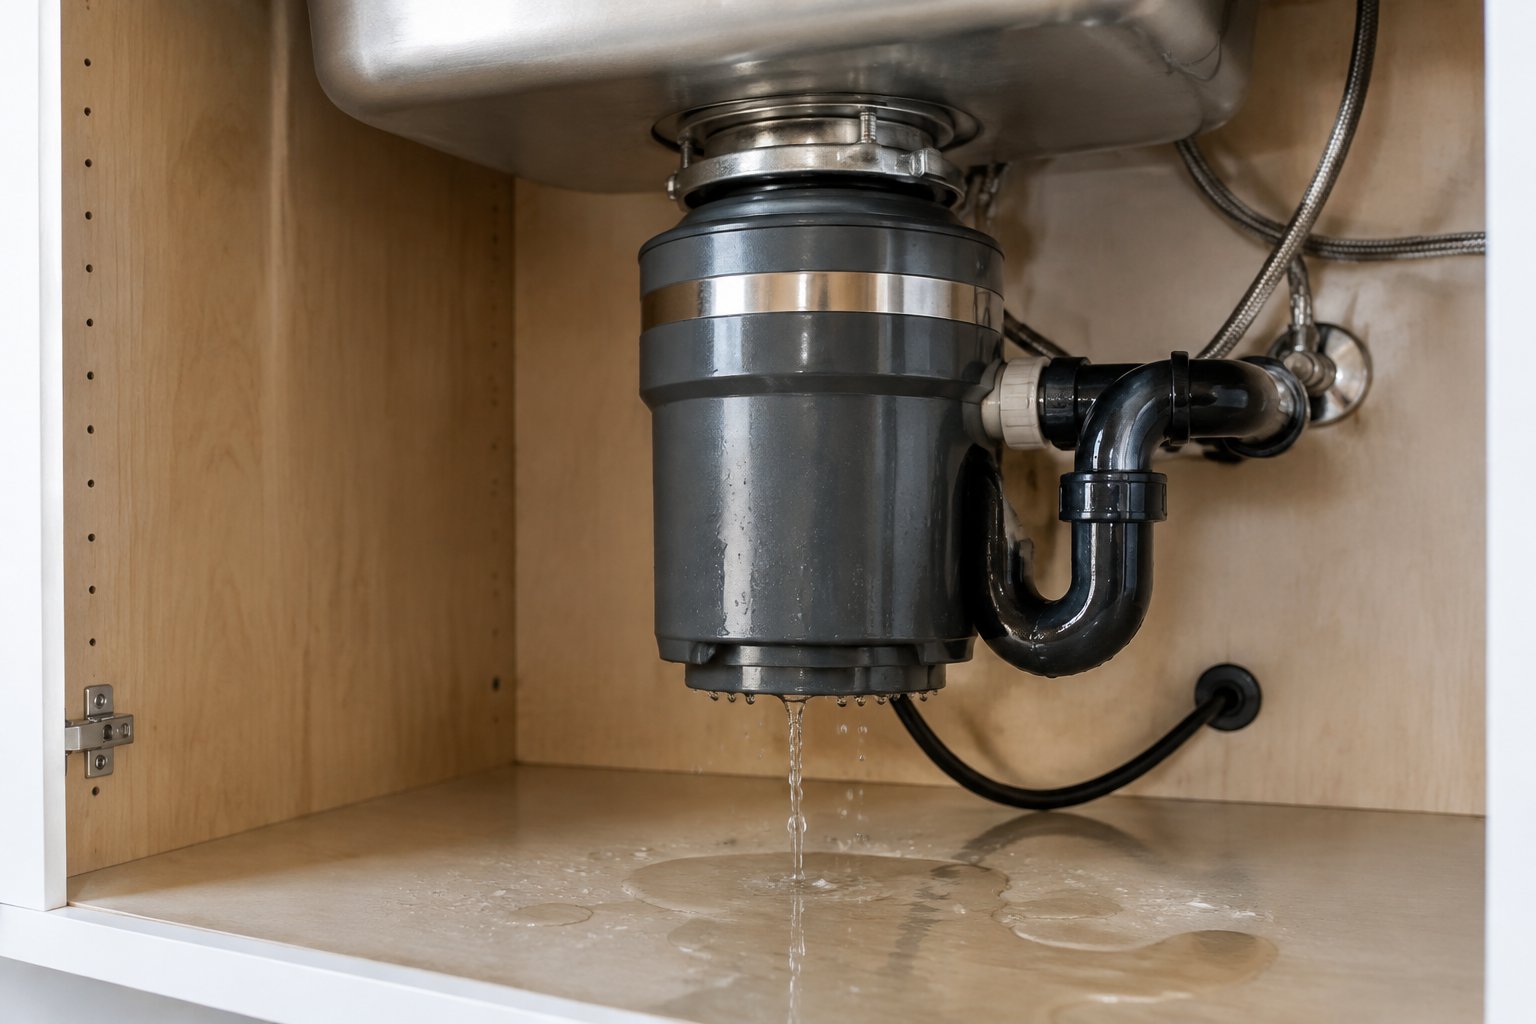
You reach under the kitchen sink for dish soap and your hand lands in a puddle. The cabinet floor is damp, the cleaning bottles are wet, and there is a slow drip coming off the underside of the unit. Water inside a closed cabinet is the kind of problem that ruins the shelf before you ever notice the smell. A garbage disposal leaking from bottom is one of the most common reasons that puddle shows up.
A true bottom leak almost always means water has gotten past the internal seals and into the motor housing, and that damage cannot be repaired; the unit needs to be replaced. The good news is that many leaks that look like bottom leaks are not. Water from a loose sink flange or a dishwasher hose runs down the outside of the disposal and drips off the lowest point, which fools most homeowners. Confirming the real leak location first can save you the cost of a new unit.
Keep reading to learn how to trace the leak safely, which repairs are worth your time, what replacement runs in a Las Vegas kitchen, and how coverage works for future breakdowns.
Make the Area Safe and Confirm the True Leak Source
Cut the power first, then dry everything and watch where the water comes back. Water plus an electrical appliance under a dark cabinet is a real shock hazard, and a wet unit can also short out.
Clear everything out of the cabinet. Put down dry towels, wipe the disposal body completely dry, and give yourself room to see all sides of it. The leak location is easier to find on a clean, dry unit than on one that is already soaked.
Work slowly here. A five minute check now tells you whether you are buying a fifty cent gasket or a new appliance.
Turn Off Power at the Circuit Breaker Before Inspecting
Flip the breaker that feeds the disposal and the dishwasher to off. If your unit plugs into an outlet under the sink, unplug it as well, since switching the wall switch off does not remove power from the cord.
Some disposals share a circuit with the dishwasher, which is allowed in many homes, though the unit's user manual is the best authority on how yours should be wired. Confirm the switch does nothing before you put your hands near the unit.
Keep a flashlight handy so you never need to reach into a dark space blind. With the power off, you can safely start tracking the water.
Use a Dry Paper Test to Trace Where Water First Appears
Wrap dry paper towels around the sink flange at the top of the unit, then wrap another set around the drain discharge elbow at the base. Fill the sink with cold water, hold it a minute, then pull the stopper and let it drain.
Check both wraps. A wet upper wrap points to the flange gasket. A wet lower wrap points to the discharge gasket or drain pipe connection. Both dry, with water still dripping off the bottom of the motor housing, points to an internal problem.
A leak test using paper towels is the method plumbing pros use because it removes guesswork. Run the test twice if the results are not clear.
Rule Out Water Running Down From the Sink Flange or Side Connections
Before you accept a bottom leak, check every connection above and beside the unit. Look at the dishwasher connection on the side, the drain pipe connection at the discharge, and the P-trap below it.
Water tracks along metal and plastic. A slow seep at the dishwasher hose can run the length of the housing and drip from the reset button area at the very bottom. That is why the reset button is such a misleading spot.
Also glance at the faucet supply lines and the underside of the sink basin. Once you know exactly where the water starts, you can figure out what failed.
Why Is a Garbage Disposal Leaking From the Bottom?
Three failures cause a genuine bottom leak: failed internal seals, a cracked or corroded housing, and a worn flywheel bearing that destroys the seals around it. All three are age related.
Most disposals have a shaft running from the motor up into the grinding chamber. Seals around that shaft keep water in the chamber and out of the motor. When those seals wear out, water follows the shaft straight down into the motor housing and exits at the lowest point.
A licensed plumber interviewed for a repair guide named seal failure around the internal bearings, caused by age, as the most common reason a disposal leaks from the bottom. That single fact explains most of the puddles homeowners find.
Failed Internal Seals Let Water Reach the Motor Housing
Internal seal failure shows up as a steady drip from the very bottom of the unit whenever water runs, with the top and side connections completely dry. It gets worse over weeks, not days.
Once water reaches the motor windings, you get rust, a burning smell, or a unit that hums and stops. Many manufacturers build these seals as non serviceable parts, so there is no replacement gasket to install.
If the drip only appears when the disposal is running, and stops when it sits idle, that fits a seal problem too. The next question is whether the shell itself is still sound.
A Cracked or Corroded Housing Can Cause a True Bottom Leak
Cracks and corrosion in the shell let water out through the metal instead of past a gasket. This is less common than seal failure, but it happens as units age.
Look for red orange flaking, pinholes, or a hairline crack on the body once the unit is dry. Corrosion can spread under the paint, so a spot that looks like a stain may be thin metal.
Epoxy patches on a corroded shell buy weeks, not years. A shell that has failed in one place is already thin everywhere else, so plan on replacement.
A Worn Flywheel Bearing Can Damage Internal Seals
A failing bearing lets the grinding shaft wobble, and that wobble chews up the seals riding on it. The leak comes second; the bearing came first.
Listen for the warning signs before the water shows up. A rattling or grinding noise with nothing in the chamber, a unit that vibrates harder than it used to, or a motor that slows under normal food loads all point to bearing wear.
Replacing a bearing means opening the motor housing and pressing in new parts, which costs more in labor than a new disposal costs outright. Before you accept any of these, make sure the leak is not coming from somewhere simpler.
Top and Side Leaks That Can Look Like a Bottom Leak
Two gaskets cause most of the confusion: the one where the disposal meets the sink flange, and the one where the drain pipe leaves the disposal. Gasket deterioration in either spot sends water down the outside of the unit.
Other common look alikes:
- A loose or cracked dishwasher hose at the side inlet, held by a single hose clamp
- A dried out P-trap connection or a slip nut that has worked loose
- A drain hose that sags and holds standing water
- Condensation or a slow faucet supply drip landing on the unit
None of these require a new disposal. That makes them worth attempting first.
Which Garbage Disposal Leak Repairs Are Worth Trying?
Three repairs are worth a homeowner's time: tightening a dishwasher hose clamp, replacing a worn drain pipe gasket, and resealing the sink flange with fresh plumber's putty. Each one is cheap and reversible.
Keep the power off for all of them. Have a bucket and towels ready, because the P-trap holds water even after the sink drains.
If a repair does not stop the drip on the first try, stop and reassess. Re-tightening a fitting past snug cracks plastic threads.
Tighten or Replace a Loose Dishwasher Hose Clamp
Find the hose running from your dishwasher into the side inlet on the disposal. The clamp holding it loosens over time from vibration.
Snug the screw with a nut driver, then run a short dishwasher cycle and watch the connection. If the hose is stiff, cracked, or swollen at the end, cut off the damaged inch or replace the hose.
This is the single easiest fix on the list. When the clamp is tight and water still appears, look lower.
Replace a Worn Drain Pipe Gasket and Check the Discharge Connection
The discharge elbow bolts to the side of the disposal with a rubber gasket between them. That gasket flattens and hardens with age, and a flat gasket seeps.
Unbolt the elbow, pull the old gasket, seat a new one, and retighten evenly. While you are there, inspect the discharge pipe and P-trap for cracks, and reseat any slip nut that spins freely.
On an InSinkErator or similar unit, the replacement gasket costs a few dollars at any hardware store. If the drip has moved to the top instead, the flange is next.
Reseal a Loose Sink Flange With Fresh Plumber's Putty
A leaking flange drips down the side of the unit and mimics a bottom leak perfectly. The fix is new plumber's putty under the flange rim.
Support the disposal, twist it off the mounting ring, lift the flange out of the sink hole, and scrape off the old putty. Roll a fresh rope of putty, press the flange down, snug the mounting bolts evenly, and wipe the squeeze out.
Reconnect the mounting assembly, restore power, and run water for a full minute. If the drip is gone, you are done for a few dollars.
When a True Bottom Leak Means the Disposal Should Be Replaced
Replacement is the right call when the paper test shows dry connections and water still comes off the motor housing. Internal seals on many units are not designed to be serviced, and when one goes, others follow.
Plumbing professionals note that by the time gaskets start leaking, the disposal has often passed its expected lifespan anyway, which makes a gasket repair a short term patch on an old unit.
Skip the repair entirely if you see rust holes, a cracked shell, or a motor that hums without spinning. At that point the number you need is the replacement price.
How Much Does Garbage Disposal Replacement Cost?
Garbage disposal replacement is one of the cheaper appliance swaps in a kitchen, usually a few hundred dollars for the unit and the labor to install it. The unit itself is the smaller share of that bill for basic models.
Price depends mostly on horsepower and grind quality. A half horsepower builder grade unit sits at the low end, while a one horsepower stainless chamber model with sound insulation sits well above it.
Labor runs higher when the plumber has to correct an old mounting assembly, replace a corroded drain pipe, or reroute a dishwasher connection at the same time.
National Garbage Disposal Replacement Cost Ranges
Nationally, most homeowners pay $200 to $625 to replace a garbage disposal, with an average of about $550, based on garbage disposal replacement costs tracked by Angi. The unit alone runs about $50 to $225 for a 1/3 to 1/2 horsepower model and $200 to $400 for a 1 to 1¼ horsepower model, and installers typically charge $50 to $100 per hour.
That national pricing covers the appliance, the new mounting hardware, and the labor for a straightforward like for like replacement.
Budget more when any of these apply:
- The existing unit is seized to the mounting ring and has to be cut free
- The drain pipe or P-trap is corroded and needs replacing
- You are upgrading horsepower and the electrical connection needs work
- There is no dedicated switch and one has to be added
Ask for a written bid before work starts so you can see the part cost and the labor cost separately.
Las Vegas Replacement Estimates From a Cited Local Source
Local plumbing rates in Southern Nevada vary by contractor, and the most reliable way to get a real number is a written bid from a licensed local plumber.
The Southern Nevada Water Authority runs a Water Smart Plumber program that lists Nevada licensed plumbers who must be licensed and insured in the state for at least five years, provide a one year warranty on their work, and give a written bid based on an hourly rate instead of a flat project rate. That written bid requirement makes comparing quotes much easier.
Program plumbers also commit to responding to a customer inquiry within 24 hours. Get two bids before you choose, and ask each one whether the price includes hauling the old unit away.
How to Decide Between Repairing and Replacing the Unit
Repair when the problem is a connection, a clamp, or a gasket on a unit under about five years old. Replace when the leak is internal, the shell is cracked or corroded, or the motor struggles with normal loads.
Age is the tiebreaker. Home inspector reference data lists the estimated life expectancy of a food waste disposal at 12 years, and a bottom leak on a unit near that mark is a signal the rest of it is close behind.
There is one more factor worth weighing: whether the repair or replacement is something your home warranty plan would handle in the future.
Planning for Future Covered Garbage Disposal Repairs
A home warranty plan is built for the next breakdown, not the one already dripping under your sink. A plan you buy today will not pay for a disposal that is leaking right now.
Coverage applies to eligible breakdowns caused by normal wear and tear, subject to the plan's service call fee, coverage limits, and exclusions. Plans purchased directly generally have an initial waiting period before coverage becomes active. Those terms live in the service contract, so read them before you enroll.
How Home Warranty Garbage Disposal Repair Coverage Generally Works
Garbage disposal coverage is included in the Essential Plan, along with plumbing systems including stoppages, water heaters, dishwashers, and the electrical system. The Enhanced and Premium tiers build on that same foundation with broader appliance protection.
Eligible repairs are those caused by everyday wear and tear on a covered item, subject to your service call fee, the plan's coverage limits, and listed exclusions. A plan works alongside your homeowners insurance, which handles sudden events such as fire or storm damage instead of normal appliance failure.
Coverage for home systems and kitchen appliances sits under one contract, so if the leak turns out to be a plumbing issue rather than the disposal itself, it may fall under the plan's plumbing coverage, depending on the failed component, the cause, and the plan's limits and exclusions. That matters when the cause is not obvious at first.
What Existing Plan Holders Should Do When a Disposal Fails
If you already hold a plan, file the claim before you call a plumber on your own. Paying for the repair yourself first can make the claim ineligible.
You can submit a service request online any time of day, or call the existing customer line at (702) 641-8888. Once the service fee is paid, a provider is dispatched and typically calls within two to three hours to set the appointment.
Tell the representative exactly what your paper test showed. A clear description of the leak location helps the dispatcher send the right trade the first time.
How a Local Contractor Dispatch Can Simplify Eligible Repairs
Dispatch removes the part most homeowners dread: finding and vetting a plumber while water is still dripping. A Las Vegas home warranty plan sends a licensed, vetted local professional to you.
More than 85% of claims are resolved on the first visit, and completed repairs carry a workmanship guarantee that sends a contractor back at no additional cost if the same issue returns within 30 days. Each customer also gets a local account manager who knows the file.
Coverage is available across Nevada service areas including Henderson, North Las Vegas, and Boulder City, and eligibility is confirmed by address. None of that helps if the wet unit stays connected too long, though.
Replace a Failed Unit Before Water Reaches the Wiring
A confirmed bottom leak needs to come out soon, because water inside the motor housing eventually reaches the wiring compartment at the base of the unit. That is where a nuisance drip turns into a shock or short circuit risk.
Leave the breaker off until the unit is replaced. Running a disposal with failed internal seals or a cracked housing pushes more water into the motor every cycle, and the reset button area at the bottom sits right above the electrical terminals.
Keep a shallow pan under the unit and check the cabinet floor daily. Particleboard cabinet bottoms swell fast once they soak, and replacing a cabinet base costs far more than replacing a disposal did.
A quick plan for the next few days:
- Keep power to the disposal off at the breaker
- Use the other sink basin, or plug the drain and hand carry water out
- Schedule the replacement or file your claim right away
- Dry the cabinet fully before putting anything back in it
Once the new unit is in, run the sink full and repeat the paper test at both gaskets. A clean test at install is the easiest way to confirm the job was done right. For questions about which plan protects the systems in your home, reach the new customer line at (702) 509-7007.
What Your Next Repair Bill Does Not Have to Look Like
A puddle under the sink is a small problem with a clear path. Dry the unit, cut the power, run the paper test, and you will know within ten minutes whether you are tightening a clamp or shopping for a new disposal.
Desert homes work their plumbing hard, and the disposal is one more item on a long list that eventually wears out. Knowing which failures are repairable keeps you from paying for a new appliance you did not need, and knowing which are not keeps water away from live wiring.
For the breakdowns still ahead, a Dwellness plan covers eligible wear and tear repairs and sends a vetted local contractor to your door, with 97% of claims approved. Compare home warranty services or get in touch to see what coverage fits your home.